advertisement
The following is a post by Bethany of Math Geek Mama.
My kids love doing crafts. Unfortunately, I am not especially crafty, nor do I feel called to prepare crafts for my kids all the time and then clean up the gigantic mess that remains.
There are a lot of benefits to doing arts and craft projects, however, and I’ll admit that it is fun to watch them get creative. I love it even more, though, when I can weave learning into our crafts and kill two birds with one stone! So this simple Valentine Symmetry Craft is the perfect combination of fun art and important math all in one.
advertisement
Note: Some links in this post are affiliate links.
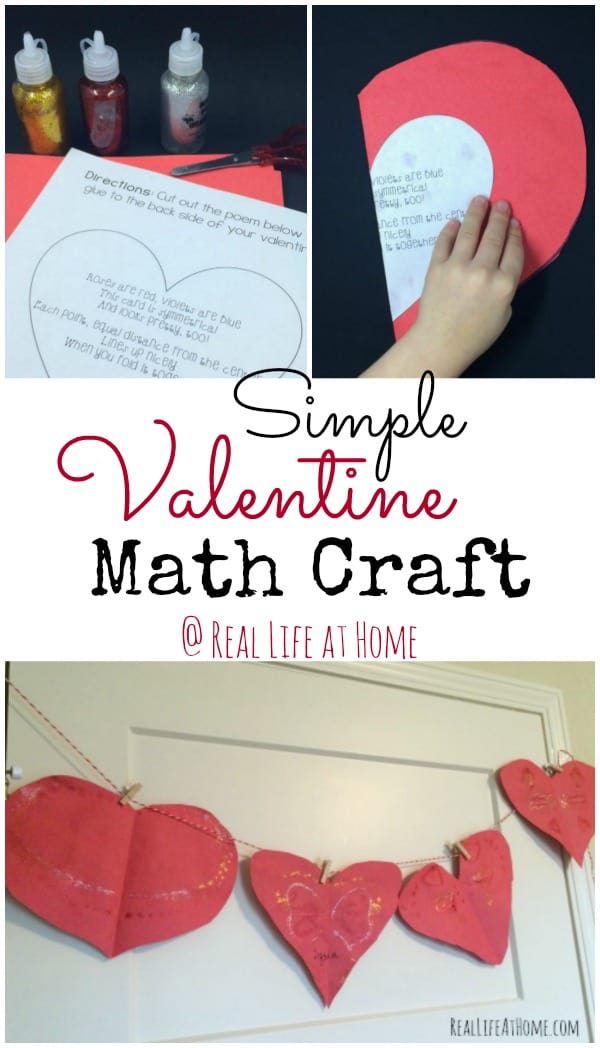
Materials Needed for this Valentine Symmetry Craft:
- Red construction paper (or card stock)
- Black marker
- Scissors
- Glitter glue or puffy paint (or finger paint would be fun too, I’m just not that brave)
- Printable poem (download below)
To Set Up the Valentine Symmetry Craft:
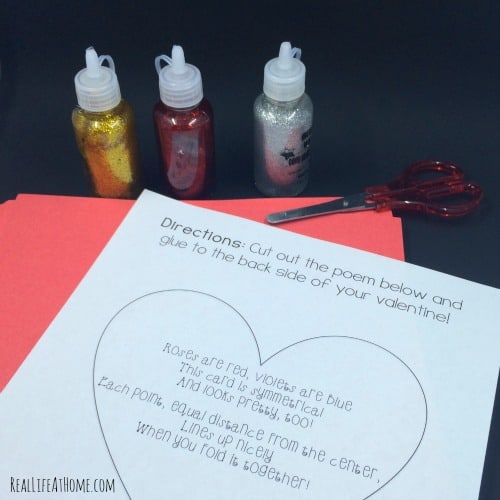
To begin, give each child a red piece of paper. We used construction paper, but card stock would work nicely as well.
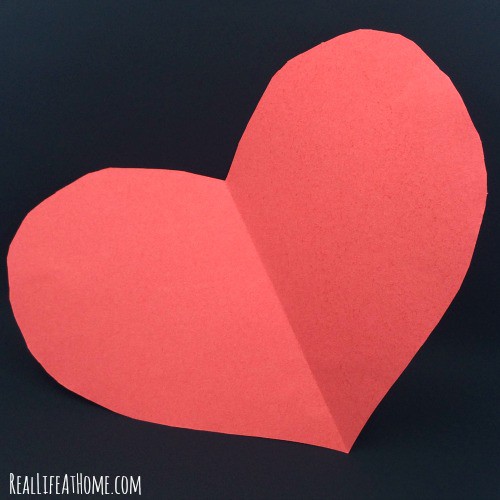
The first thing you will need to do is make a symmetrical heart out of each piece of paper. To do this, fold the paper in half. Then, draw half of the heart shape on the folded edge of paper.
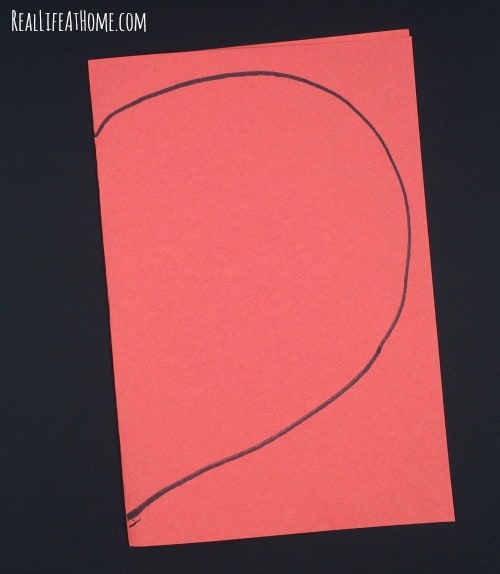
Then when you cut the heart out, cutting both halves of paper at the same time, the heart will be symmetrical.
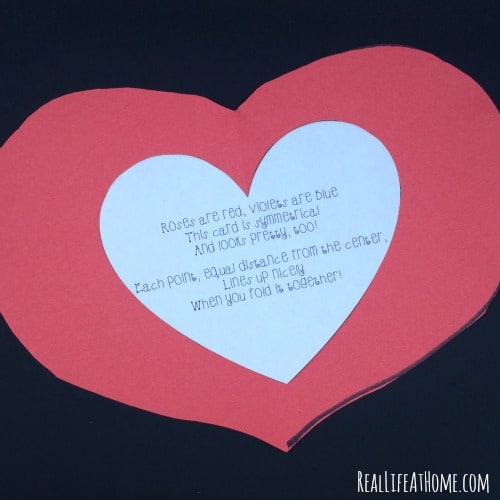
You also need to cut out the poem to glue to the back of your valentine. We did this first, since the front would be covered in glitter glue and needing to dry.
I would go ahead and discuss it before hand as well, to help your child understand symmetry and talk about what’s going to happen as they decorate their valentine.
Here are some ways to explain symmetry to your kids:
- The fold in the middle is called the line of symmetry
- It’s like a reflection in a mirror
- Each point on one side of the heart is an equal distance from the line of symmetry as it’s corresponding point on the other side
- Each point lines up or touches it’s reflection point when you fold the heart together
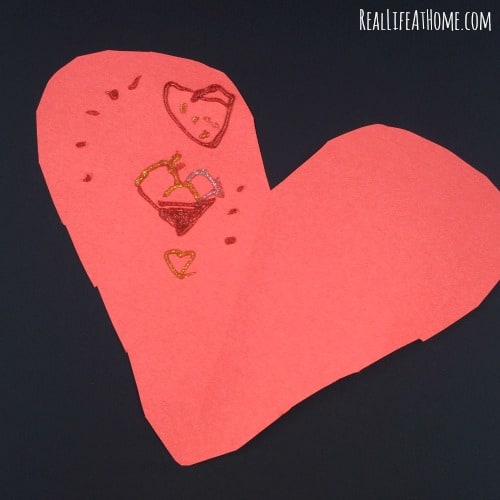
After preparing the heart and discussing symmetry together, allow your kids to create any design they would like on one side of their valentine. This could be pictures, dots, or just globs of paint, as long as they only fill one side.
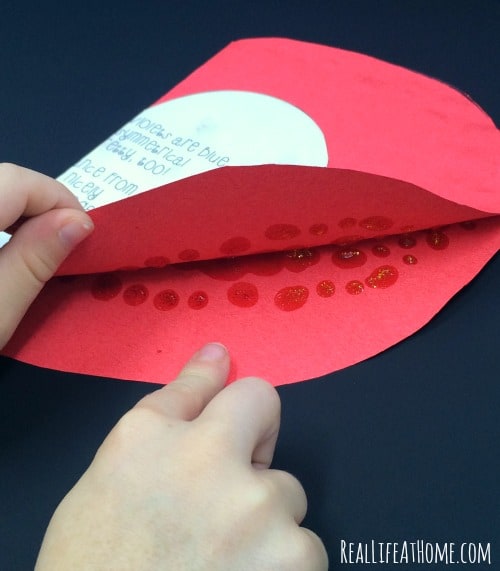
Once their design is complete, gently fold the valentine in half and press together to create a unique symmetrical design on the inside of the valentine.
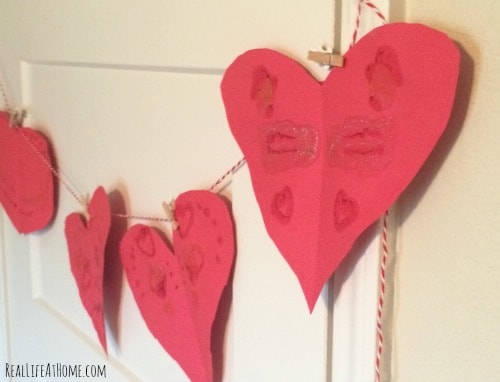
Then admire the finished product!
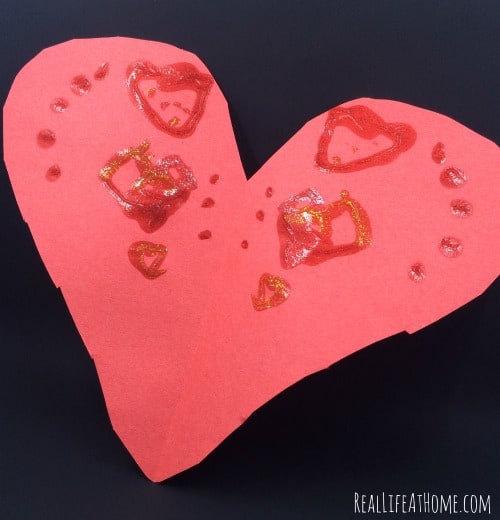
Once it’s finished, ask your kids to describe the symmetry they see and ask them to point to places that are symmetrical.
Here are some of our finished products:
Download the Valentine Symmetry Poem Printable
Variations for a Valentine Symmetry Craft:
- After they finish their design with the glitter glue, have your child sketch with a pencil the other side of their valentine before folding it to see if it lines up with where they thought it would
- Use stickers to create a design on one side of the card and then have your child place corresponding stickers on the other side
- Use stickers and have your child measure equidistant points to place their stickers symmetrically on their card. (This is good measurement practice as well)
- Use melted crayons to create a symmetrical art design
To go along with our Valentine craft, we also read the books, Love, Splat and The Biggest Valentine Ever.
And if you’re looking for more resources for exploring symmetry, try reading Seeing Symmetry together!
What other ideas would you add to explore symmetry when making valentines?
Other Posts You Might Like:

Join 40,000+ Other Awesome People
Subscribe to the Real Life at Home weekly newsletter to get our latest content, exclusive free printables, learning activities, and ideas for celebrating with your kids all year
Leave a Reply