advertisement
How to Dye Pasta for Kids Crafts and Sensory Activities Post Preview: This includes a step by step tutorial (with pictures) of how to dye pasta for pasta crafts and sensory activities to use with kids for some easy and inexpensive fun and learning. This post, which was originally published on September 9, 2009, was updated in September 2018.
Way back when my kids were much younger, we used to belong to a homeschool co-op. I often taught classes, including a few years of teaching preschool. One year, I decided that I wanted my preschool co-op class to work on a project for their Moms. Many of the kids have never been to traditional school, so their Moms had never been the recipients of handmade projects made at school.
I really kept wavering about what I should make with them, but then I thought of the fun, inexpensive, and educational craft of pasta necklaces. Making pasta necklaces features great fine motor practice, as well as math for patterns.
 of how to dye pasta for pasta crafts and sensory activities to use with kids for some easy and inexpensive fun and learning. | Real Life at Home")
advertisement
If you would like to make some of your own pasta necklaces, pasta crafts, or dyed pasta for sensory experiences, I’m going to show you how to dye pasta in this post. It’s easy and inexpensive, which is great when working on crafts for kids!
How to Dye Pasta for Pasta Crafts and Sensory Activities
Here’s what you need to dye your own pasta for a variety of crafts (you can also dye rice with this same method for crafts or sensory tables):
How to Dye Pasta for Crafts: Supplies Needed
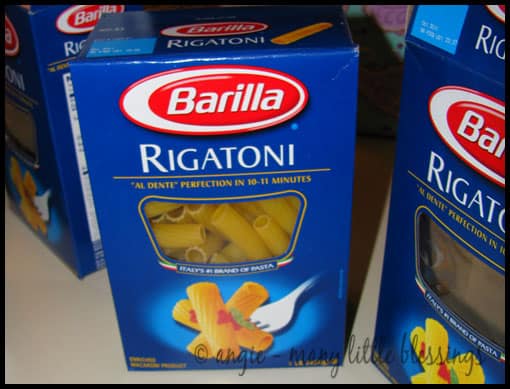
1. Pasta — there are lots of great shapes that can be used. Just keep in mind how you’ll be using them, and that will help guide you.
Because I was doing necklaces with young children, I went with only rigatoni noodles. The kids were better able to maneuver making necklaces with this larger shape.
Quick Note: There was a comment that suggested this could be an even more frugal project if store brand pasta is used. That could definitely be true, so keep that in mind when you’re buying. However, also be sure to check out the brand name boxes. When I bought these, they were actually on sale and cheaper than the store brand.
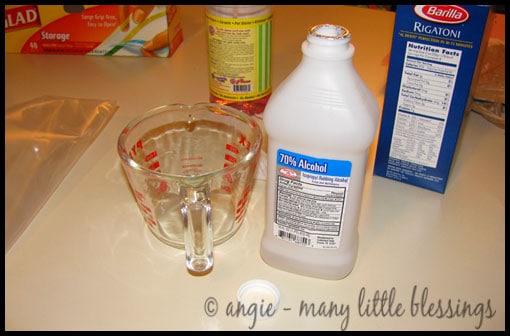
2. Rubbing Alcohol — This is also known as Isopropyl alcohol. You’ll need around 1/4 cup of rubbing alcohol for every cup or two of pasta. So, if you are making a lot, make sure you have enough rubbing alcohol before you start.
Note: I used a 70% alcohol concentration. Some people in the past reported having issues with sticky pasta with concentrations that were in the 90’s. So, consider looking for one around 70%.

3. Large Ziploc bags — make sure you have a brand that seals well. I double up my bags to further reduce the risk of leakage.
4. Liquid Food Coloring — Make sure you have a few different colors if you want to make a variety of colors of pasta. Also, don’t forget – you can mix colors to create new colors!
How to Dye Pasta for Pasta Crafts and Sensory Activities: Directions
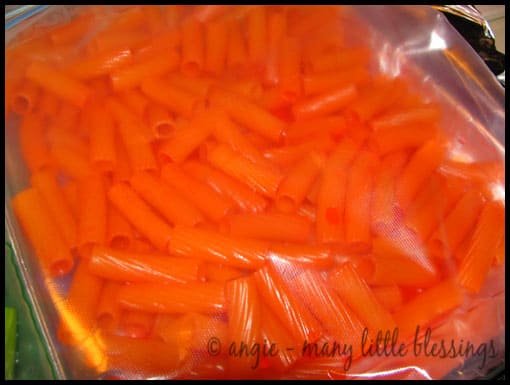
1. Get your Ziploc bag and add 1/4 cup rubbing alcohol and around 10 drops of food coloring. You can add more food coloring, if desired. Swish it around to mix.
2. Add 1 – 2 cups of pasta into the bag.
Truth be told, I added about 1/2 cup of rubbing alcohol to these bags plus double the amount of food coloring. Then I just filled the bag with pasta.
3. Really move the pasta around in the bag by shaking up the bag as well as by gently massaging the liquid around the pasta.
4. Repeat steps 1 – 3 with for each color of pasta.
5. Lay the bag flat (still sealed). I put the bags on a foil lined cookie sheet, just in case there were leaks.
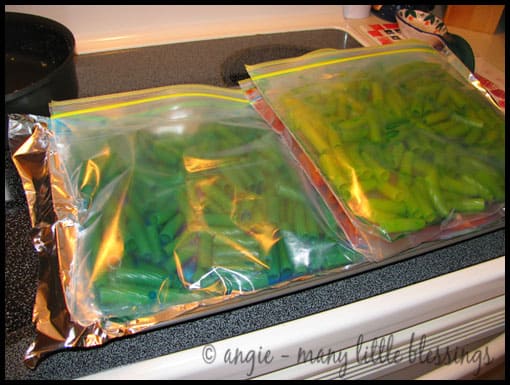
6. Allow the pasta to sit in the Ziploc bags. I flipped them over every 30 minutes for a couple of hours. You probably could let them sit for longer and flip them over less. I just loved looking at the colors as they got deeper and more vibrant, so I flipped them often.
The longer you let the pasta sit in the bags, the deeper and more vibrant they will become.
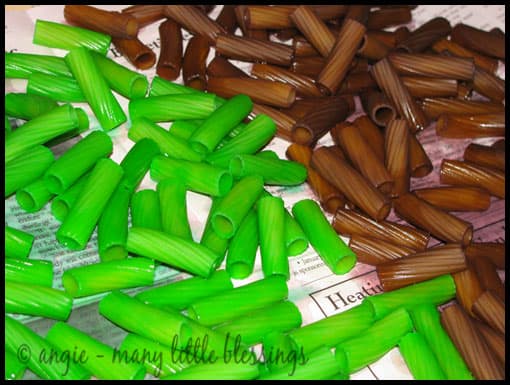
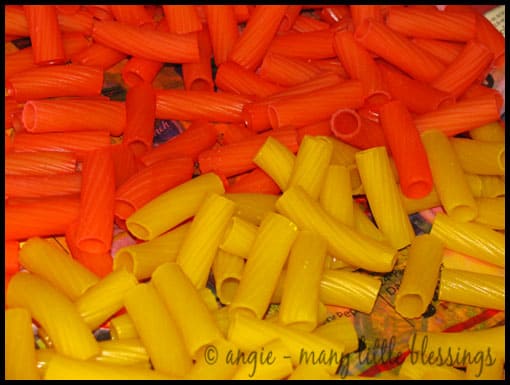
7. When you have your desired color, drain the colored alcohol out of the bag. Pour the pasta out of the bags and set the pasta out to dry.
I put newspaper on my aluminum foil-lined cookie sheets. Then I put the pasta down on them in sections by color.
Let them dry like that overnight. Once the pasta is dry, store it in a sealed container or baggie.
Making Pasta Craft Necklaces
The kids loved making necklaces for their Moms! Plus it was a great way to work on fine motor skills and patterns.
Quick Tip: When making necklaces with young kids, it is easiest for them if one side of the yarn is taped down to the table.
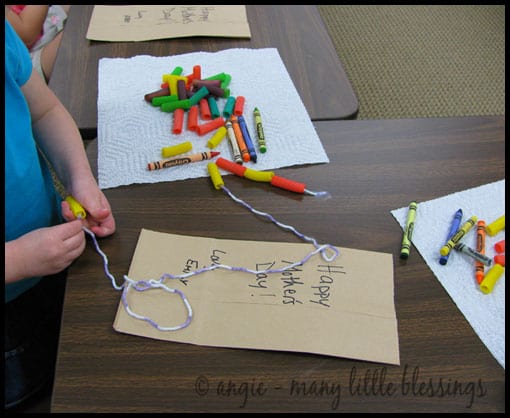
Each child also decorated a paper bag for their Moms to use as “gift wrap.” My assistant and I mostly wrote the Happy Mother’s Day on students’ bags. For our youngest students, we even wrote their names for them, if they needed help. All of the students decorated their bags with crayons after they finished their necklaces.
Having never received these kinds of handmade kid gifts, I actually had several Moms who told me that they wore their beautiful and bright necklaces to Mass on Mother’s Day!
This is a fun, easy, and frugal craft for Moms (with the dyeing) and kids!
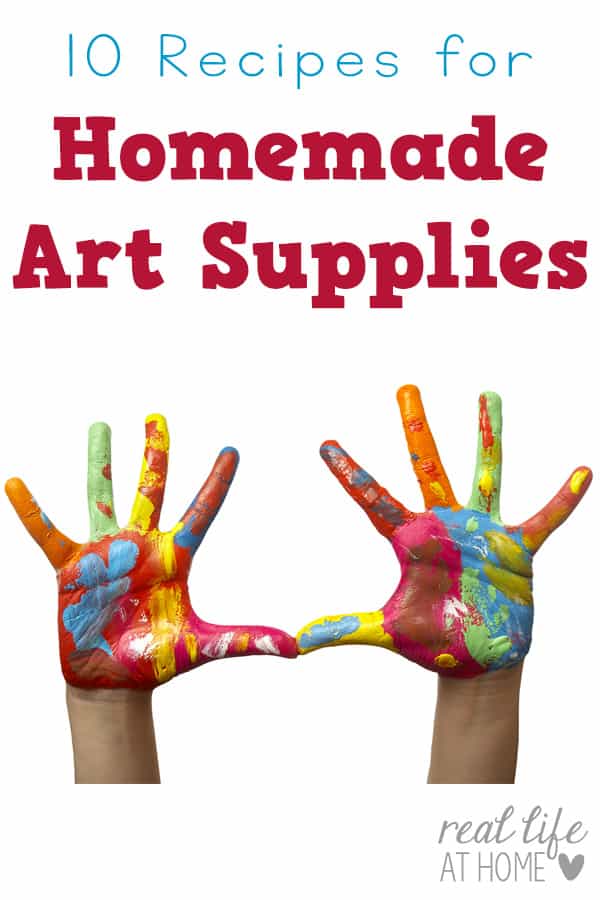
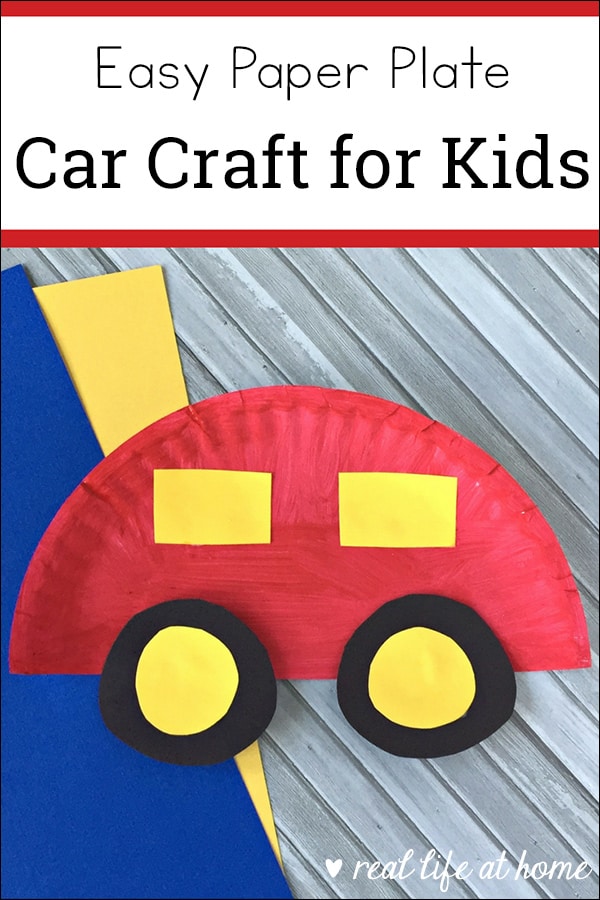
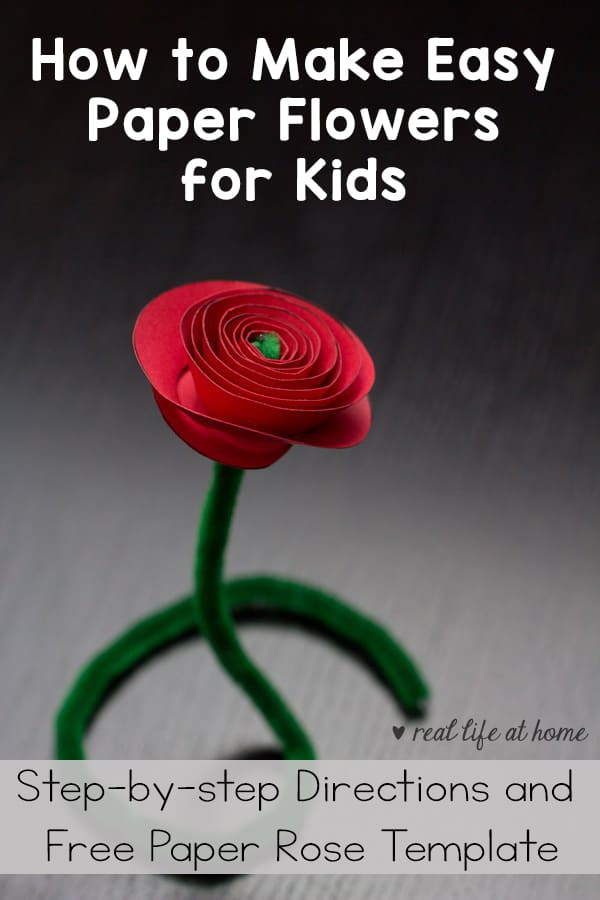
Want to try some more fun crafts?
Disclosure: How to Dye Pasta for Crafts and Sensory Activities contains affiliate links. Using them doesn’t change how much you pay. However, when you shop through them
Join 40,000+ Other Awesome People
Subscribe to the Real Life at Home weekly newsletter to get our latest content, exclusive free printables, learning activities, and ideas for celebrating with your kids all year
Thanks this worked great m,my kids loved it! We used it on ceramics!
Thanks for posting this, your directions are very easy to follow and they come out really nice.
Excellent! I’m glad that they came out well!
thank you so much for your detailed info! turned out great
Hi, Thanks for these instructions. They are so clear and easy to follow. Just wondering if the pasta sticks together at all while drying.
Ashley – No, they don’t stick together. They are still hard and just the same texture that they were when they were all in the box together.
Great! Just wanted to make sure before I laid them out to dry and didn’t give them enough space so they all stuck together. 🙂
I just found this and we are SO doing this! HOW COOL IS THIS!!!
Totally made my day!
Doing a kids craft table at our local event and I needed to figure out how to dye pasta, thanks so much for the instructions! They are on cookie sheets being colored now!
Am dying pasta for my inhome daycare. Found your site and loved the pictures! How would you go about doing rice? Same amounts of liquid? Thanks so much!
Jaime – Thanks so much for the compliment!
I haven’t dyed rice before, but if I were doing it, I would do it the same way. Although, if you’re putting a lot of rice in the bag, I would keep the same ratio of alcohol and food coloring, but I would put in more.
Good luck!
I run a preschool program at a shelter and my kiddos LOVED the dyed rice! I did the pasta tonight and cant wait to see their reaction! I made the rice and must say, it was much faster! Just put some dry rice in a bowl, add a small smount of the alcohol and adjust the food coloring to your preference. Mix really well and spread it on a cookie sheet to dry. I’ve gotten lots of compliments and the kids were Sooo excited when they saw it 🙂
Just did this, and other than an early ziploc blowout, it worked well. A few suggestions: #1 Don’t use the slide to lock type of bags as the liquid eventually leaks out the zipper. #2 FREEZER bags a must, not the thinner ones. #3 It is VERY difficult to get red colors instead of pink (I used double the amount of red dye and it still looked medium pink) but all the other colors worked well. #4 Wear latex gloves, as dye on your hands seems to be inevitable, no matter how careful you are. Thanks for the idea!!
Monica –
Agreed – I wouldn’t use the zipper kind, as they do not seal as well. I think that regular (non-freezer) bags work fine, but that’s why I doubled mine up (as mentioned). I’ve never gotten dye on my hands when I’ve done it, but I don’t touch the pasta until it’s dry.
I haven’t tried red before, but I could see how it would be hard to get it to actually get nice and red.
Glad that you had good luck, other than a blow out.
I was looking for a way to do this for garland for our Christmas tree! This is perfect thank you so much!!
I never knew how to dye pasta and quickly found this website. Mine is outside drying right now and it looks great! That was super easy. I made red (looks like red) and green to do festive lacing activities with my toddler.
I used the regular cheapo walmart brand bags and they worked fine (didn’t even double bag). No problems getting dye anywhere other than where it should be. I probably used less alcohol than you call for and quite a bit more food coloring, but it was very intuitive. I’d definitely do it again and make some more colors. I’m going to be on the hunt for fun pasta shapes from now one.
What a quick and easy way to dye pasta. My 4th grader had “pasta necklace day” for spirit week this week. The pasta turned out so bright and pretty. One suggestion for others: purple turned out black, and when I tried to make a different shade it turned out kind of a rose. I probably will stick to blue, red (pinkish, but definitely a shade of red), orange, yellow, and green. They were great. I will be doing this with my toddler story hour group very soon. Thank you.
Oh, I didn’t measure at all, just put enough liquid to get everything wet and the drops of color to the shade I liked. I used the Wilton icing colors (concentrated gel) for some, and liquid for others. Both worked well, but the gel is less messy.
Love your website! I’m a Pre K teacher and I need a quick idea to for making jewelry necklaces. I googled “how to dye pasta” and your websit was the first on the list. The instructions were easy to follow. My pasta has been soaking for about an hour and the colors look fabulous! THANKS!
Oh by the way, I used the Great Value slide freezer bags and I had some leakage. Other than that, it was a simple process!
I’m so glad that you were able to find the direction and that they seem to be working well for you. I hope your students have a wonderful time with it!
Is there any chance of the colors staining clothing or hands once the pasta has dried?
I can’t promise what will happen if it gets wet (though I don’t believe it would be an issue), but just for regular use, there isn’t any staining once it’s dry.
I tested the dyed pasta by running water over it. The colors did run almost immediately.
This is so awesome! I am a grade one teacher and one hundred day is quickly approaching…In the past years I have had the kids make necklaces with fruit loops but they always end up eating them as they are counting to 100 and then their fingers get all sticky as well…so this year we are opting for macaroni necklaces and I had no idea how to dye them but so far so good! Thank you so much! 😀
Hi, thanks for posting these instructions. You really can google ANYTHING! 🙂 Just a quick question – I found the rubbing alcohol the most expensive part. I got mine from the chemist. Is it cheaper if you get it (and can you get it) from a hardware store or something?
As for colour, I have Queens Pillar Box Red and it is turning a really nice shade so far.
Nicola — Since you called it “the chemist,” I’m going to take a guess that you aren’t in the United States. 😉 Because of that, however, I don’t know the best place to suggest for buying rubbing alcohol (also called Isopropyl alcohol) where you are. I think here, it tends to be pretty cheap to buy and is readily available at many different types of stores. Sorry that I don’t have ideas for you about where to get it less expensively.
Im in Australia and i bought some ‘isocol rubbing alcohol’ from the supermarket. It is just isopropyl alcohol with a brand name. You can also buy isopropyl alcohol on ebay. Hope this helps.
Forgot to mention that you could always substitute the isopropyl alcohol for white vinegar. Very cheap at the supermarket 🙂
Thanks for the vinegar tip! (My husband is going to love the smell, haha.) This was exactly what I was looking for. I’m from the US but live in Finland. Rubbing alcohol is expensive and only from the pharmacy.
Thanks for that, Angie! Yes, I hail from Australia. I will try the hardware store the next time I need some – but for now… it was a great success! So much so that I have to make more! Thanks again!
I love your instructions w/the bags but the old-school method still works really well – just mix everything up in big mixing bowls and stir w/a spoon every once in a while 🙂 A couple of additional notes – paste type food color is great for really intense colors and while it is more expensive, it lasts forever. Also, the alcohol/food color mixture can be reused several times. Just store in empty jars w/lids.
I am going to make these today! Can’t wait. I am wondering: my kids are going to use white glue to attach them to a piece of construction paper. Will the dye come off when it mixes with the glue?
I haven’t tried it, so I can’t promise anything, but my gut instinct is that as long as you have let the pasta fully dry before using it like that, you should be fine.
Thank you for this great tutorial! My toddler received some dyed pasta in a busy bag swap and loved it so I wanted to make her more. We used a shape called ditalini, they look like beads to begin with. Great fun! I wonder if you could use koolaid packets for the dye? We have used it to dye fabric so why not? Ill have to try that and see. :0)
Has anyone else had the problem of their lovely blue pasta drying green???
Hi Helen,
It helps to use a lot of blue food coloring. I used at least 20 drops to 1/4 c. rubbing alcohol. Since the pasta is initially yellowish, it will be more turquoise-ish… Any of the colors that mix with yellow to make a new color will require more food coloring to get a “truer” hue. I found that purple is the hardest to come out prettily, since purple and yellow make a brownish tone when mixed. Good luck! Hope this helps next time.
I use $1 store rigatoni (best pasta for stringing – ziti or penne are too narrow). I also use a lot of dye and just a splash of rubbing alcohol. I mix it all together in a metal bowl with a metal spoon – and not for very long, just until everything is well coated. Then I lay the pasta out on cookie sheets and move it around so it doesn’t stick to the cookie sheet. Comes out great. No worries about leaking ziploc bags.
Hi, I have just dyed some pasta using surgical spirit instead of rubbing alcohol, and it came out perfect. But on second thought, did not use any of it. It was too risky to use with kids under three, as I was afraid they might ingest the pasta. I think the same can be said for rubbing alcohol.
I will definitely try it out with white vinegar, and therefore the pasta will be completely edible and safe with small kids. Another idea how to make use of dyed pasta is making collages. We are going to use the pasta to decorate picture frames. Thank you for the tips.
At the bag flipping stage right now. Glad to find your sight.
Note about orange — a little red goes a long way.
Hi, a really silly question, but can these be eaten?
if cooked will the colours stay or will they run in the water? thanks.
Since the dyeing process is done with rubbing alcohol, they shouldn’t be eaten after they’ve been dyed.
Hi Angie!
I was Googling for these directions and was tickled to see one of my friends as THE top search result for how to dye pasta for crafts! thanks for the tips,
Meredith
Awww…thanks, Meredith! 🙂 You’ll have to let me know how your pasta dyeing goes!
Thank you so much for sharing! I was wondering if you could cook the pasta is you dyed it with vinegar? Thx!
In theory, I would imagine that you probably could eat it if you used vinegar instead of rubbing alcohol. I personally probably wouldn’t, but if all you’re using is pasta, vinegar, and food coloring, those would all be edible things.
Thanks so much for this info! I am definitely trying this. Can you cook and eat the pasta if you use vinegar instead of alcohol? Thx!
I tried this last night. The first bag I started I did with alcohol, but because I am putting bags together for babysitting kits for a bunch of young girls (necklace making), I decided I should try the vinegar just in case a little kid put it in his mouth. I was not happy with the way the vinegar ones turned out. It didn’t completely cover up the noodles, and then the vinegar soaked into the noodles that when drying they were sticking to the newspaper. The blue bag with alcohol came out crisp and bright, compared to the other 4 bags…still yellow spots and newspaper stuck to it. I will only use the original recipe from now on! Thanks for the tutorial. 🙂
Found your instructions to be very easy. Had a bit of trouble dying the pasta though. My pasta stuck to each other and was very starchy. It left white starchy dots on the pasta. I wonder if it is because I bought the pasta at the dollar store. Any advice?
Hmmm…I don’t know. Maybe, like you said, it was the pasta. I’ve not had that problem before, but it does sound like a pasta problem.
I tried it again with a different kind of pasta, It was definitely the pasta. Thanks again for the instructions.
I have dyed pasta like this for years. Just a few differences in how I do it…..1) I usually use plastic shoe boxes, cover the pasta with alcohol and don’t cover container. I stir them occasionally and leave in until I get the desired color 2) I use a slotted spoon and lay the pasta out on newspaper to dry 3) I keep the colored alcohol back in the bottle (one color in each bottle) to use over and over, possibly adding a bit more color when needed 4) I use the Wilton gel dye and get brilliant colors.
Since you used rubbing alcohol for this process did you notice any smell once you laid it out overnight or when the kids were making the necklaces? I am doing this as a sensory table activity for my kids to go along with our spring theme. My only sorry is any sort of alcohol smell.
I’m a librarian who is new to pre-school & toddler programming, and I came across your page in a search on google for “how to dye pasta.” I was so happy to see a Catholic homeschool blog with the answer. Thank you for your help! I am dyeing pasta orange to have kids make pumpkins by threading pasta through green pipecleaners in time for Thanksgiving.
The project sounds so cute!
Thanks for stopping by the blog – I’m glad it was a happy surprise! 🙂
Can I use the color tablets that come in the Easter color egg kits? Thank you
I’ve never tried that, and my gut instinct would be no, but you could try it if you didn’t mind that the batch that you made might not come out exactly like you wanted it. You’ll have to report back if you try it and it comes out nicely! 🙂
Mine hasn’t dyed At all and is a sticky mess
Hmmm…I haven’t run into that before personally, so I’m not sure why that would have happened. Did you make any changes to ingredients used or the directions? Since most of the liquid is rubbing alcohol, that usually doesn’t have any issue drying when all laid out to dry.
When one person above in the comments mentioned that hers was sticking together, it turned out to be the pasta they used (she said she bought it at a dollar store). She came back and commented that when she used a different pasta, she didn’t run into that problem the second time she tried it.
I think the problem may be that you used a higher concentration of alcohol. I tried this and used 91% isopropyl alcohol and get very sticky pasta. When i went back and diluted the alcohol with a little water, I didn’t have the problem anymore. In the picture, she appears to be using 70%. But unfortunately, they sell a lot of different concentrations. I hope this helps. Also, I just remixed my sticky pasta with the new diluted solution and redried the pasta. So not all is lost if it ends up sticky.
What a great idea Angie! I didn’t think that pasta would hold colour that well.
I made the dyed pasta. Turned our perfect! With the 10 drops as the max, I made the full 7 color rainbow including pink and black. So 9 colors in total. I let them soak overnight (by accident) they became so vibrant. By blue is very blue. My violet is definitely violet, same with the the indigo and black. I read some have issues with the orange. The amount of drops is key. Here is what I did for all my colors.
Color /Drops:
Red= 10 red
Orange= 8 yellow, 2 red
Yellow= 10 yellow
Green= 10 green (8 yellow, 2 blue)
Blue= 10 blue
Indigo= 7 blue, 2 pink, 1 red
Violet= 5 pink, 1 red, 4 blue
Black= 10 black
Pink= 10 pink