advertisement
advertisement
Growing up in a military family, I was taught to love our country, respect our flag, appreciate our freedoms, and celebrate the birth of our nation in style. The Fourth of July meant watching (or participating in) a parade, setting off fireworks, and enjoying the company of friends and family while remembering how fortunate we are to live in the United States of America!
As a parent, I have tried to pass on an appreciation of our nation and its people to my sons by teaching them the history of our great country and celebrating the birth of our nation and the freedoms for which our Forefathers fought. Two years ago, I was thumbing through Family Fun (my all time favorite magazine) when I came across a fun Fourth of July craft activity: patriotic t-shirts! I decided to try making the t-shirts with my boys, then 4 and 7, and their cousin, then 6, as we talked about the importance of the Fourth of July for our nation, our family, our freedom, and our faith prior to the full day of festivities on the 4th.
To make the shirts, I purchased plain white t-shirts and fabric paints from our local craft store. I also picked up some fun star-shaped buttons to add a bit of sparkle to the shirts. At home, I found a sheet of freezer paper large enough to cover the front of the shirt and a piece of cardboard that would fit inside the shirt.
- Start by preparing the shirt according to the directions on the fabric paint. This usually involves pre-washing and drying the shirt with a gentle detergent and without fabric softener.
- Make star-shaped stencils in several sizes. I like to use old file folders or pieces of cardstock for a strong, stable stencil. If you need help creating a symmetrical star shape, you might try printing out this star or this one; adjust the print size for larger or smaller stars as needed.
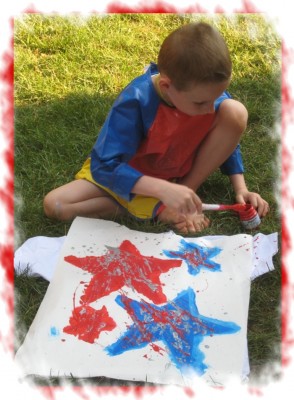
- Trace stars onto the non-waxy size of the freezer paper into a pattern to your liking; then cut out the centers of the stars. Once this is done, iron the freezer paper onto the shirt waxy-side down. The freezer paper will adhere to the shirt allowing you to paint the stars quickly and neatly.
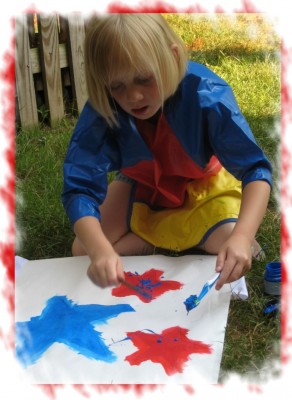
- Place the cardboard inside the shirts and paint the stars. Then, using an old paint brush or toothbrush, splatter paint in contrasting colors onto the stars. Allow the paint to dry before removing the stencil to avoid smearing your child’s masterpiece.
- Once the paint is thoroughly dried and the freezer paper stencil has been removed, follow the directions on your paint for setting the paint.
- Finally, sew on buttons, sequins or other embellishments.
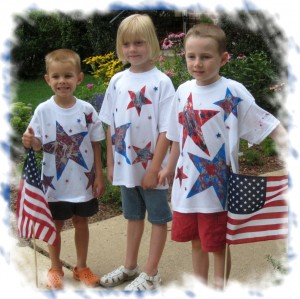
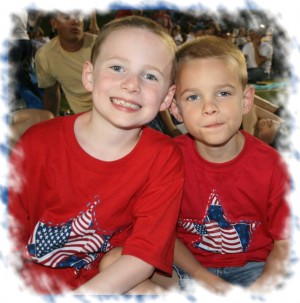
Be prepared for loads of compliments when your kids proudly wear their shirts to your town’s Fourth of July parade or fireworks spectacular, and at least once a week after that!
My boys LOVED their shirts. A year later, they were still wearing them with pride, and so I thought they would just wear them as we again celebrated the Fourth last year. But then, the summer issue of Family Fun arrived and before I had a minute to sit and peruse the fun crafts and activities, the boys had opened the magazine, found the Fourth of July crafts, and selected “the shirt we are going to make this year!” (with a few modifications). It seems that the one-time activity I had planned was quickly becoming an annual summer tradition in our family.
This time, I went to the local craft store and purchased two plain red t-shirts, a patriotic-print remnant of cotton fabric (on sale for $1.00 a yard), and embroidery thread in coordinating colors. We started working on the shirts a bit earlier this year as the design the boys had chosen to create was sewn, not painted, and I was fully expecting to have to step in and finish up the project on my own. After all, my 5 and 8-year-old sons had absolutely no experience with sewing. Imagine my surprise when the boys not only completed the entire sewing project on their own, but did such a wonderful job that to date, no one to date has commented on their shirts: I think they may just be too well done; no one can believe the boys actually made them!
- Pre-wash and dry the shirts and the fabric as you would normally wash them to avoid problems with uneven shrinkage later on.
- Create a stencil of a star that covers the torso area of the shirt. Trace the stencil on to the shirt using white chalk.
- Cut a square of fabric large enough to cover the star you have cut out and pin it to the inside of the shirt, right side of the fabric against the inside front of the shirt. (You want the right side of the fabric to show through the t-shirt when you cut out the t-shirt material inside the star later on).
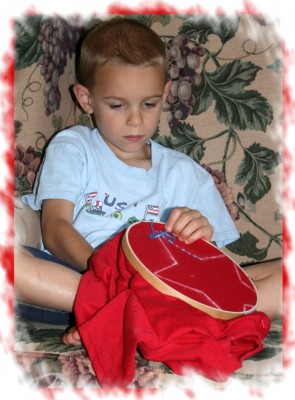
- Using a doubled piece of embroidery thread, stitch a running stitch along the chalk-line of the star. I purchased embroidery hoops to help the boys hold the shirts, sew only the front of the shirts, and avoid pulling or pinching the t-shirt fabric. It worked wonders!
- Remove the shirt from the embroidery hoop. Carefully pull the fabric in the center of the star away from the front of the shirt.
- Cut along the inside of the stitched star, about 1/4″ to 1/2″ in. Be careful that you don’t cut the patriotic fabric along with the t-shirt fabric.
This year, the boys are once again hard at work creating a Fourth of July t-shirt. They have decided to combine two ideas from two different years of Family Fun Fourth of July creations. By the time you are reading this post at the Homeschool Classroom, we will have photos of our latest patriotic fashions on our blog at Adventures in McQuill-land. Stop by, and maybe, just maybe you’ll find an idea for your next patriotic t-shirt. After all, these shirts are so much fun to make, you may just end up starting a new tradition in your home as well.
Jennifer is a homeschooling Mom of two active, inquisitive, and crafty young boys. When not thumbing through the pages of Family Fun magazine or crafting with the boys, she can be found blogging at Adventures in McQuill-land where she hosts Making Memories Monday, a weekly meme featuring bloggers’ memories from the past, stories from the present, and ideas for making memories for the future.
Join 40,000+ Other Awesome People
Subscribe to the Real Life at Home weekly newsletter to get our latest content, exclusive free printables, learning activities, and ideas for celebrating with your kids all year
Love those shirts! 🙂
They look amazing! The boys did such a great job!
Awesome idea! I will have to get my boys to set up shop and create something patriotic.
I love the painted star shirts – they look amazing! It sounds like they are a lot of fun to make too. 🙂 We will definitely have to try this!
What beautiful tshirts, we are making some festive shirts today as well, and I came across your ideas as ones to share with the kids for ideas! Thanks for sharing, I am a new follower! Hope you have a safe and wonderful Forth Of July!!
Nicole
I saw this on a 4th of July roundup and just had to pin it. I hope you’ll share your best post of the week on my Friday Flash Blog Linky Party going on ALL weekend at The Jenny Evolution.
Jennifer
thejennyevolution.com