advertisement
advertisement
Late this past summer we made some leaf prints for our home. The process was simple and fun, and the results were beautiful!
I thought it would be fun to use the same technique to make some Christmas artwork. We all have a little bit of extra greenery in our homes this time of year, or you can go clip a few pieces from a pine tree nearby if you want – I won’t tell. 😉
Supplies:
Newspaper, or something to cover the surface you’ll be working on; small pieces of pine branches; something to hold your design in place – I used foam mounting tape – hot glue or poster tack would work too; paint in green and blue (or color of your choice); glitter glue; items to decorate your finished artwork – we used sparkly sequins; a paint roller; and plain paper or whatever you wish to print on.
My 4 year old son and 6 year old niece had just finished watercolor painting stacks and stacks of paper, so I chose one with pretty, muted colors to use for our background: 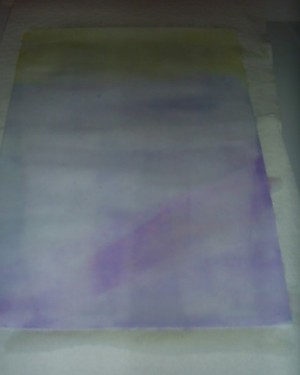
First, arrange the pine branch pieces the way you want. We chose to make the shape of a Christmas tree: 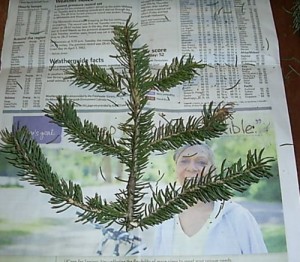
A star would be nice, or any other shape that you like. We experimented with making a star: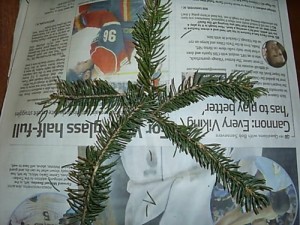
A small child might enjoy making simple squares and triangles.
Once you have your design laid out, attach it to your work surface in some way. Hot glue might work, but I chose to use up a little roll of foam mounting tape (which is sticky on both sides) that we had lying around.
Set out a saucer of green paint (we used tempera). I thought the basic green was a bit too… green. So we added in a touch of blue to make it more “piney”. Run your roller through the paint several times, then run it gently over your pine branch design. Make sure to completely cover all the parts. 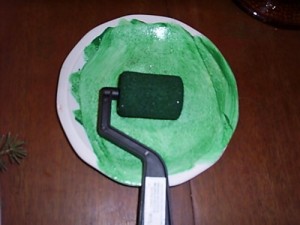
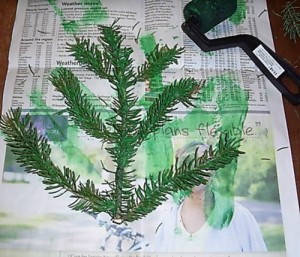
Take your paper and press it down on top of the pine design, making sure to press all the areas. Pull it off and you’ve made a print! 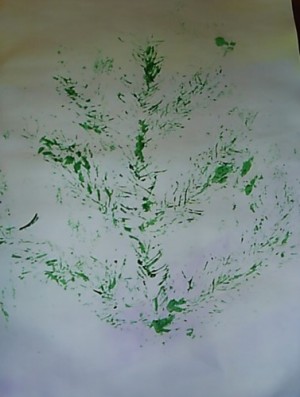
You can do this many times with the same design on other papers. Or add another color and print again on the same paper. There are so many ways to make this a unique piece of artwork.
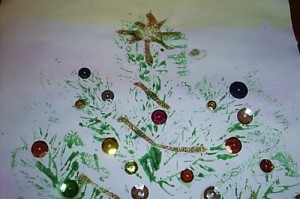
Personally, I thought it would look sweet to leave it like this and add just a few bird, squirrel, and owl stickers on the branches. 🙂
But I was overruled and we decided to glam it up a bit. 🙂 After we made the print, we added some gold glitter glue for garland and a star, and some sequins for Christmas lights and ornaments.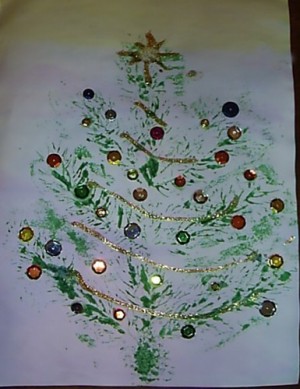
It would be fun to make a whole winter scene and add some pulled-apart cotton balls to the base for snow! Let your children’s imaginations run with this; I’m sure they’ll come up with great ideas!
Alternatively, you could simply put a thin layer of paint on a dish and press pine branch pieces into the paint, then stamp them onto paper to create a design. This would look nice pressed around the edge of a paper plate (the ridged kind would add a neat texture) and then decorated and used as a wreath (cut the center from the plate).
I hope your family has as much fun with this art project as we had!

Visit Nicole’s personal blog at Tired, Need Sleep.
Join 40,000+ Other Awesome People
Subscribe to the Real Life at Home weekly newsletter to get our latest content, exclusive free printables, learning activities, and ideas for celebrating with your kids all year
Very cute idea. I love that you used buttons.
Have a wonderful day
Gorgeous idea! I haven’t seen anything like this before, and the result is very beautiful.
Wow, this is so pretty! I love the idea of using Pine branches to print a Christmas tree. Thanks for sharing.
Great idea. The glammed up version is very festive for Christmas, but the natural print is something you can do in January and February as a winter project too. Thanks!