advertisement
advertisement
It’s important for small children to have many opportunities for creating “open-ended” art – art in which there are no expectations or samples to follow, only an experience to be had.
Sometimes this can be child-directed art, meaning the child has access to a variety of art supplies and can do what he or she wishes with them. This may not be realistic for very small children, and readiness for this will depend upon the individual child.
Another kind of open-ended art is what I call mama-directed art, because it’s the mama (in our home anyway) that sets these up with a clear idea of the process (but not product!) in mind. These are art projects, not crafts, that teach a certain art technique, or allow for a more controlled experimentation with only one or two art supplies. These are perfect for very young children, and many of them are also a sensory experience, which is absolutely wonderful for those little brains! In a moment I’ll list several art project ideas, and once you begin thinking along these lines you’ll come up with plenty of your own ideas. Just imagine all the fun that is going to be going on at your house in the new year! 😉
(Quite often, if you are really itching for something cute to hang up or give as a gift, you can set things up so that the end product will look nice (just keep that part of your plan a secret), while still having it be an open-ended project.)
Here’s a list of open-ended art projects to get you started:
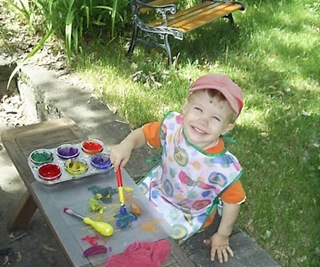
- Finger paint with temperas (poster paints) on the glossy side of freezer paper. Use one color the first time, and gradually add more colors as you do this again and again. Make this into a color lesson by painting with two primary colors to create a third color – very exciting!
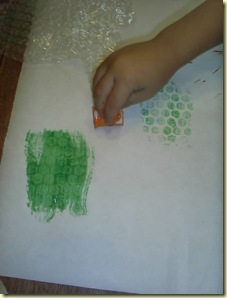
- Paint with a variety of objects – bath pouf, sponges, sticks, crumpled plastic wrap, bubble wrap, potato masher, etc. Anything works for this – just look around and grab a few things.

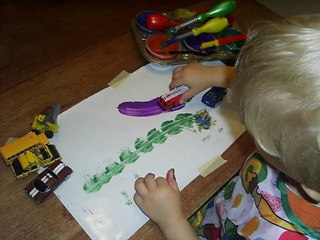
- Run little cars through puddles of paint to create tire tracks, or walk some dinosaurs through a few puddles to make foot prints.

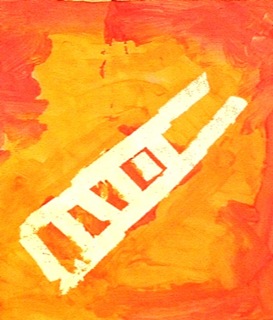
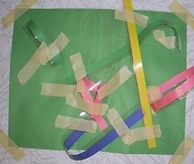
- Put masking or electrical tape on a piece of paper, paint the entire page, then remove the tape to reveal the white paper design underneath.

- Bundle crayons or markers together with rubber bands, and use them to color on a large sheet of paper.
- Mix glitter into paint or glue before painting with it. If you use regular school glue it will dry clear, leaving only a coat of glitter. This makes pretty wrapping paper!
- Go outside, grab some rocks, and paint them. Add eyes and pom-poms to make pet rocks.

- Place some dollops of tempera on a piece of paper in a shoebox. Put a rock or small ball in too. Close the shoebox, secure it with a rubber band, and let your child shake, shake, shake it. Open it up and look at the design created (this is an all-time favorite!).
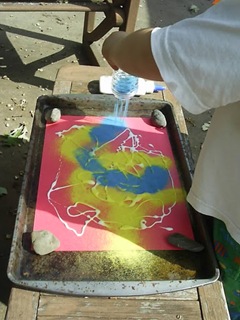
- You’ll want to put a layer of newspaper down for this one. Use dot painters, markers, or liquid watercolors on paper towels, then spray with water and watch the colors spread out. (This was one of Matthew’s all-time favorites – he loved that spray bottle!) Alternatively, show your child how to use an eye-dropper, pipette, or even a baster to drip water onto the colors.

- Put a big puddle of glue on sturdy cardboard or cardstock (toddlers are good at big puddles of glue, aren’t they?) then stick stuff in it. Scraps of paper, sequins, pom poms, buttons, googley eyes, feathers, yarn, ribbon, fabric scraps, or anything you don’t mind donating to the pursuit of art – this is a lot of fun for a child just beginning to figure out what glue is all about. Children seem to be fascinated with glue when they first discover it, and often they will make “glue piles” where items are just glued on top of one another and sandwiched together.

- Stick things to a large sheet of contact paper hung in a window or on the wall (use the ideas from #10 above, or anything else you can think of).

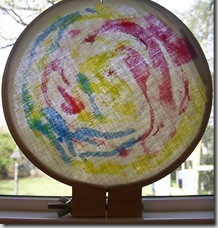
- Use markers, dot painters, or roll-on painters on fabric. I used muslin in an embroidery hoop in the photo below, and had Matthew (3 years old at the time) paint it. It is one of my very favorite things to look at!

- Make designs with white crayons on white paper. Then let your child paint over it with watercolors (darker colors work best) to reveal the “magic” design.
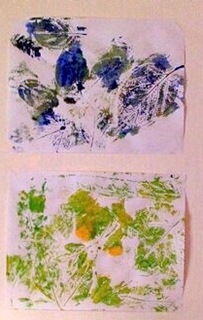
- Use a small roller to paint over leaves, then press paper on top to make leaf prints.

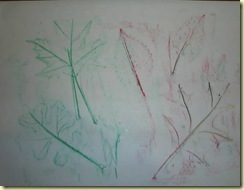
- Place leaves under paper and rub crayons or chalk over the top to create leaf rubbings.

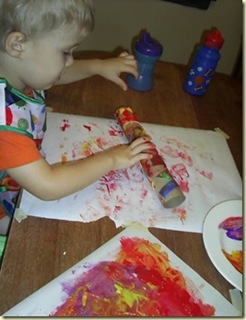
- Place a variety of foam stickers on a cardboard tube. Roll the tube in a tray of paint, then over a large piece of paper. Watch the shapes show up on the paper.

- Color on sheets of aluminum foil with window markers and window crayons.

- This is a great sensory experience, as well as an art project – grate a bar of ivory soap into a large pan or bowl or plastic tub. Add a bit of water, then let your child play in it. Show him or her how to stir it up to make bubbles, then how to grab a handful and squeeze it together to form shapes and sculptures. Use googley eyes to make faces, or add in a drop of food coloring or paint, if you want. (Add scented oils and dried flowers to make a gift, but no coloring.)
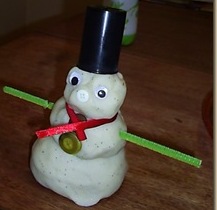
- Use old play dough to create sculptures and allow them to dry. Add some little objects to stick into the play dough, or use them to make people, or snowmen.

- Make a “nature collage” with play dough. Place balls of play dough into egg carton cups, then find objects in nature – pine cones, bark, maple seeds, sticks, rocks, leaves, acorns, weeds – and stick them into the balls of play dough. This can be really beautiful.
- Use strips of cardstock to create 3-dimensional artwork. Glue or tape the ends of the strips to paper, making “bridges”.

- Use glue to create a design on cardstock or cardboard. Shake on a generous amount of salt, then shake off the excess. Using a paintbrush and watercolor paints, touch the paintbrush to an area of salt. The watercolors will seep along the salt lines. This is very pretty and little bit mesmerizing to watch.
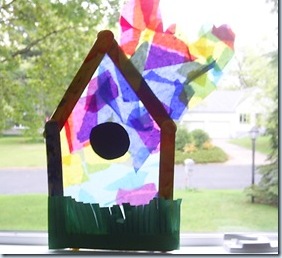
- Tear pieces of tissue paper, then stick to contact paper for a pretty suncatcher. If you want, use craft sticks to make a frame for the design. This can turn into pretty much anything you want, if you are looking to make something a bit more “crafty”.

- Create a glue design on construction paper, sprinkle on colored sand (definitely an outdoor activity!), then shake off the excess.


Experimenting with art, with all its colors and textures and techniques, fits perfectly into the world of a small child.
These projects are great for toddlers and preschoolers, and many are fine for babies who are able to sit up on their own. They may taste-test a few things, but they will quickly learn not to. 🙂 In our home fun with art is encouraged as early in life as possible. Doing this also helps Mama slowly adapt to greater levels of messiness, as well as acquire quicker clean up skills, ha ha (we have to learn and grow too, right?).
Children who are allowed and encouraged to do open-ended art really learn to express themselves through their artwork. This can come in handy when they are older and need a positive outlet for what they are feeling and experiencing. A painting, even one that makes a mess, is a hundred times better than a temper tantrum. 😉
Enjoy your art time with your children! Feel free to leave more art project ideas in the comments!

Read about more art projects and homeschool-preschool activities at Nicole’s blog, Tired, Need Sleep.
Join 40,000+ Other Awesome People
Subscribe to the Real Life at Home weekly newsletter to get our latest content, exclusive free printables, learning activities, and ideas for celebrating with your kids all year
LOVE THIS! Thank you for posting and reminding me how important this is!
Great tips!!
Excellent post, love his sunshiney face as he creates!
Came by from Hip Homeschool Hop to say hello.
Great ideas! We may pull out hte paints today!
What an AWESOME post! I am currently on search for things to do with my littlest one…love some of these ideas! Thank you! I’m also following you now (would appreciate you following me back)…visiting from Hip Homeschool Hop. Blessings!
Loved your list. Thanks for giving us all of the wonderful ideas. Thanks for joining in on the Hip Homeschool Hop!!
Excellent, excellent ideas! I am not very artsy/crafttsy, so a list like this is very valuable to me. I plan to bookmark this post, and then choose one of your activities each week for my 4, almost 5 year old to do. I am SURE that his 4 older brothers and sisters will want to participate too!
Have a great day!
Roan